
Carving a wooden spoon begins long before an edge touches wood. It starts with learning how tree fibers run, how sap lubricates an iron edge, and how moisture leaves a freshly split log. When you work with fresh wood, known among green woodworkers as greenwood, the material yields to hand tools with surprising ease. The water held within the cellular structure of living timber acts as a natural lubricant for your tool blade, reducing friction and allowing gouges to pare away thick shavings with gentle hand pressure.
Why do so many beginners struggle with their first piece? Most novice carvers reach for dry, seasoned lumber from a home center, which is rock hard and prone to splintering under edge tools. Working with seasoned hardwood without heavy machinery requires brute force and constant sharpening. By working along the natural grain of unseasoned timber, you can carve an entire utensil using quiet hand tools at a kitchen table or workbench, turning a simple piece of firewood into an heirloom that feels balanced in your palm.
Selecting an easy spoon blank from green birch
What makes paper birch or silver birch such a favored starting point for green woodworking? Birch offers a close, uniform grain that resists tearing out when cut from multiple angles. It has a modest density compared to oak or sugar maple, meaning your gouges will slice through the cells rather than bounce off them. Freshly felled birch, cut within three to six weeks and kept shaded, retains its moisture. This moisture softens the lignin, which is the natural organic glue binding plant cell walls together.
When you head out to find stock, seek a straight branch or small log section between 3 inches and 4 inches in diameter, and roughly 10 inches to 12 inches long. Avoid pieces with large branch knots or spiral bark lines, because twisted bark indicates twisted wood fibers beneath. Split the log down the middle using a small splitting wedge or a hatchet struck with a wooden club, known as a mallet. Never carve right through the pith, which is the soft, spongy center circle of the tree. The pith shrinks at a drastically different rate than the outer sapwood, and keeping it in your blank will almost guarantee that your finished spoon splits down the center.
| Wood Species | Relative Hardness | Grain Uniformity | Best Use Case |
|---|---|---|---|
| Paper Birch | Medium-soft (when green) | High | Ideal for first-time carving and everyday eating spoons |
| Sugar Maple | Hard | High | Heavy-duty cooking spoons and hard-wearing spatulas |
| Cherry | Medium | Medium-high | Decorative spoons and scoops with rich color contrast |
| Red Oak | Hard and brittle | Low (open pores) | Not recommended for eating utensils due to open capillary pores |
Once you split your log, inspect the flat face. You now hold a half-round billet. Sketch the outline of your spoon directly onto the split face with a dark pencil, placing the bowl at the wider end of the grain. Keep the neck of the spoon, where the handle joins the bowl, at least three-quarters of an inch wide in this early layout. This gives you extra mass to absorb clamping or carving pressure later.
Roughing out the blank shape with a drawknife
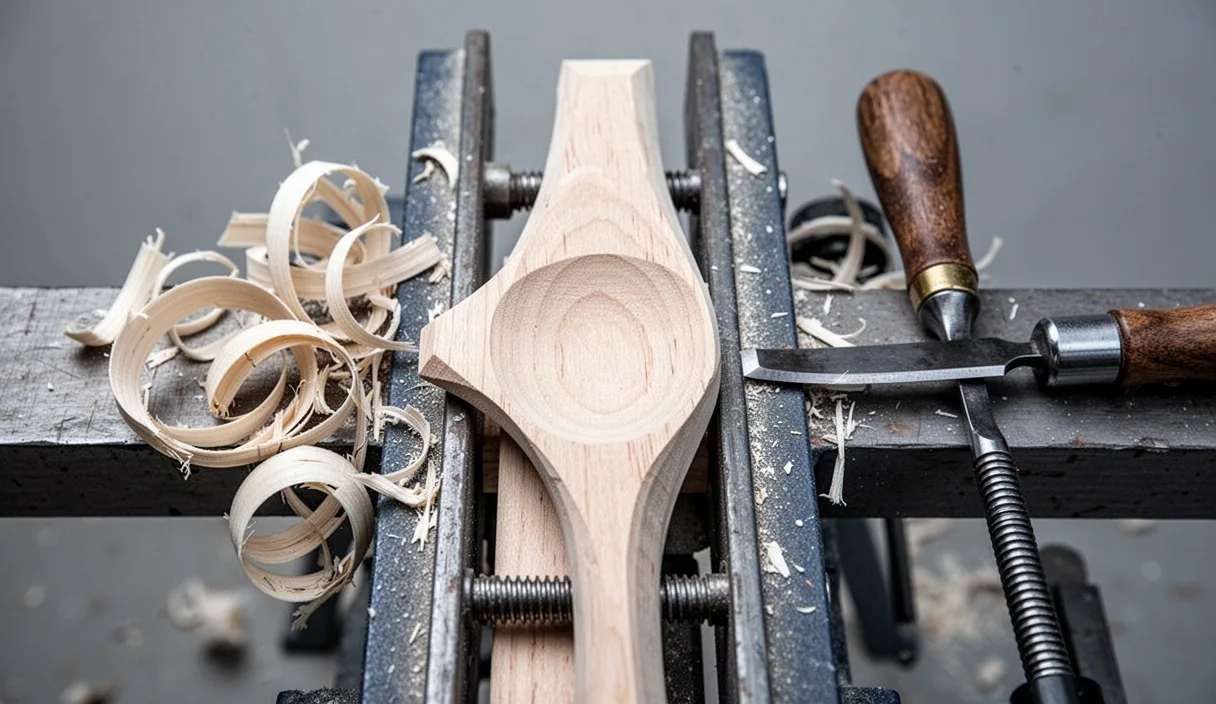
The drawknife is an ancient, two-handled blade designed to remove bulk waste quickly while following the natural line of the wood fibers. Why do we pull this blade toward our body instead of pushing it away? Pulling engages your larger back and shoulder muscles, giving you far more stability and control than your forearms could provide on a push stroke. Because the drawknife is exceptionally sharp, you must secure the billet firmly in a bench vise, a carving horse, or with a heavy holdfast clamp.
Mount the birch blank with the pencil sketch facing upward. Hold the drawknife handles with both wrists straight, setting the flat bevel of the blade against the wood. Angle the blade slightly skewed, roughly thirty degrees to the direction of your pull, rather than square to the timber. Skewing creates a slicing motion, similar to how a chef pulls a knife through a ripe tomato rather than pressing straight down. Begin shaving away the square corners outside your pencil lines, working from the middle of the handle toward the end, then turning the blank around to taper the sides of the bowl.
- Keep elbows pinned: Lock your elbows near your ribs and pull with your torso to avoid sudden slips.
- Watch the grain direction: If the blade digs deep and tries to dive beneath your pencil lines, stop immediately. You are cutting against the grain. Flip the blank end-for-end and pull the opposite way.
- Work to the line slowly: Leave roughly one-eighth of an inch of extra wood around your pencil boundary. This margin protects your project against accidental gouges during roughing.
Take shallow passes, removing ribbons about the thickness of cardstock. As you approach your rough profile, flatten the bottom of the bowl area so it sits level on a table, but do not make it too thin yet. You need ample thickness under the bowl to withstand the downward pressure of the curved gouges in the next operation.
Hollowing the hollow bowl with a hook knife
Hollowing the bowl is often where new carvers feel the most apprehension, but it becomes predictable once you understand cross-grain cutting. A hook knife, also called a spoon knife or scorp, features a curved blade shaped like a tight letter C or J. The tool is designed to cut across the fibers rather than directly with them. Why cut across the grain here? If you try to hollow a spoon by cutting straight down the length from handle to tip, the tip of the knife will catch the long fibers and split the bowl in half like kindling.
Rest the back of the spoon bowl against your chest or secure it firmly in a carved wooden cradle clamped to your bench. Grip the handle of the hook knife with your dominant hand, wrapping your fingers fully around the grip. Place the clean pad of your non-dominant thumb against the back of the blade or against your tool hand to act as a fulcrum. Instead of swinging your arm, squeeze your hand closed and rotate your wrist inward, like turning a doorknob. The thumb acts as a stable pivot, allowing the curved edge to slice thin, crescent-shaped curls out of the wood center.
- Establish the center cavity: Begin cutting directly across the width at the deepest point of the bowl, carving from the rim toward the center line.
- Alternate sides: Cut from the left rim toward the center, then rotate the spoon blank to cut from the right rim toward the center, meeting in a smooth bottom trough.
- Blend the ends: Once the central hollow is roughly a quarter-inch deep, gently scoop upward toward the tip of the spoon and upward toward the handle transition to create a continuous oval basin.
Stop frequently to pinch the bowl between your thumb and forefinger to check wall thickness. A reliable target for a green birch eating spoon is roughly three-sixteenths of an inch across the entire bottom and rim. If you hollow the bowl too thin while the blank is still soaking wet, the wood will lack the structural strength needed to survive the handle shaping that follows.
Shaping the handle for a natural grip
A good spoon handle does not look like a flat ruler; it looks and feels like an extension of your fingers. When we hold a tool during a meal, our fingers rest naturally against facets rather than slippery, perfectly round rods. Facets are narrow, flat surfaces left cleanly by a sharp edge. A straight carving gouge with a shallow sweep, or a small straight whittling knife, allows you to carve these long, crisp facets along the length of your handle.
Begin by thinning the handle from top to bottom. Most newcomers leave the neck far too thick, which creates an awkward, heavy utensil that flips over in a soup bowl. Pare the underside of the neck down until it flows into the base of the bowl with an organic curve. Think of this area like the arch of a human foot: it needs enough height to remain stiff, but enough taper to feel graceful. Make long, measured push cuts, bracing your thumb behind the blade on the back of the timber for fine control.
Refining the cross section
Shape the handle cross-section into an octagonal or tear-drop profile rather than an oval. An eight-sided profile gives your skin positive registration points, meaning your hand instantly senses the orientation of the bowl without you needing to look at it. Create this by first trimming the handle square, then shaving down each of the four sharp corners into a clean secondary facet.
Balancing weight and reach
Hold the spoon near the neck as you would when eating, then hold it near the tail as you would when stirring a simmering broth. Does the bowl feel heavy enough to drag the tip down, or does the handle counterweight it neatly? Birch is light, so removing wood from the middle of the handle while leaving a slight swell at the butt end creates an agreeable natural balance. Clean up any tool marks by making light, paper-thin skew cuts, leaving a burnished surface straight from the blade.
Drying your wet spoon blank safely without cracks
Why do freshly carved spoons crack? Wood shrinks as it loses moisture, but it shrinks unevenly. It contracts roughly twice as much along the growth rings as it does across them, and barely at all along the length of the tree trunk. If the thin rim of your spoon bowl dries in dry room air while the thicker neck remains damp, the rim tries to shrink around a rigid core. Tension builds within hours, snapping the wood cells apart and leaving a clean split across the bowl.
To prevent this, you must slow down the rate of evaporation so the entire spoon dries at a uniform pace. The simplest, most reliable method uses nothing more than a plain paper lunch sack and the damp wood shavings you produced while roughing out the blank.
- Gather clean shavings: Collect a few handfuls of the damp, ribbon-like birch shavings from under your bench. Avoid shavings that touched the floor where dirt or grit could adhere to them.
- Pack the paper bag: Place the finished spoon inside the brown paper bag, surround it loosely with the damp shavings, and fold the top of the bag down twice. Secure it with a wooden clothespin or paperclip.
- Store away from heat: Keep the bag in a cool room, tucked away from direct sunlight, air conditioners, and heating vents. A closet floor or unheated basement shelf works well.
The paper bag breathes just enough to let moisture escape slowly over several days, while the damp shavings maintain a high-humidity microclimate around the spoon. Leave the bag undisturbed for four to five days. After this initial period, open the bag, discard half of the shavings, and let the spoon rest for another three days. By the end of a full week, the wood will feel room-temperature to the touch, rather than cool and clammy. This indicates that free moisture has evaporated, and the spoon is dry enough for final edge burnishing or oiling.
Common mistakes
Carving failures are rarely random; they usually stem from a few predictable oversights during preparation and cutting:
- Carving toward unsupported grain: When you cut down into a hollow, your blade must cut downhill, from high wood to low wood. If you push the edge uphill out of the hollow, it will catch the fibers and lever a large chunk out of your bowl rim.
- Leaving uneven wall thickness: If the bottom of your bowl is half an inch thick while the edges are paper-thin, the rim will dry and split away from the bottom within forty-eight hours. Keep wall thicknesses consistent throughout.
- Sanding green wood: Never touch wet birch with sandpaper. The wet fibers will not cut cleanly; instead, they will fuzz up, and abrasive grit will embed into the soft pores, instantly dulling any tool you use for later touch-ups.
- Using unsharpened tools: A dull gouge crushes plant cells instead of severing them, requiring high physical force that leads to slips, crushed grain, and hand fatigue. A tool should shave arm hair before it touches the spoon blank.
Practical next steps
Now that your blank has dried safely inside its shaving bag, you can put the final touches on your project. Inspect the surface for any subtle grain lift that occurred during the drying process. With your hook knife and small straight blade razor-sharp, take whisper-thin finishing cuts across the bowl and handle facets. This cut, called the final sweep, leaves a glossy, water-resistant surface that feels silky under the fingers.
To seal the birch against kitchen liquids, apply a food-safe drying oil. Pure raw linseed oil, extracted from flaxseed, or pure walnut oil are the traditional choices. Do not use standard boiled linseed oil from a hardware store, as it contains heavy metal drying agents that are toxic when ingested. Apply the oil liberally, allow it to soak into the wood pores for twenty minutes, then buff away every drop of surface oil with a clean cotton rag. Let the oil support several days in a warm, well-ventilated spot until no oily scent transfers to your hands. Your spoon is now ready for service at the dinner table.