
When you hold a plain wooden box in your hands, the flat surfaces can feel somewhat empty. Chip carving is an old method of decorating that timber without needing a bench full of expensive gouges or an electric router. By taking out small, clean chips of wood one triangular slice at a time, you transform flat boards into surfaces that catch the light and cast crisp, dark shadows. The work demands patience, but the physical mechanics behind it are straightforward once you understand how wood grain behaves under a sharp wedge.
A decorated box lid does not rely on complex machinery; it relies on geometry, sharp carbon steel, and deliberate hand pressure. Think of the wood fibers like a tight bundle of dry drinking straws glued together. If you slice across them at an angle with a dull kitchen knife, they will crush, tear, and leave ragged fringes. If you slice through them with an acute, polished blade at the correct angle, the fibers shear cleanly away, leaving a glassy wooden facet that needs no sanding. Here is how the craft works, how the traditional patterns develop, and how you can carve your first box panel cleanly.
The folk heritage of chip carving
Why did chip carving become one of the most widespread decorative crafts across rural Europe? The answer comes down to resources and daily practicality. In the Alpine valleys of Switzerland and Austria, the forested regions of Scandinavia, and rural communities across Poland and Ukraine, farm families spent long, dark winter evenings indoors. Metal tools were precious, but a single well-tempered pocket knife was an everyday carry item. With that solitary blade and a simple pair of iron dividers, woodworkers could embellish everyday household objects such as butter molds, spinning distaffs, clock cases, and wooden keepsake boxes.
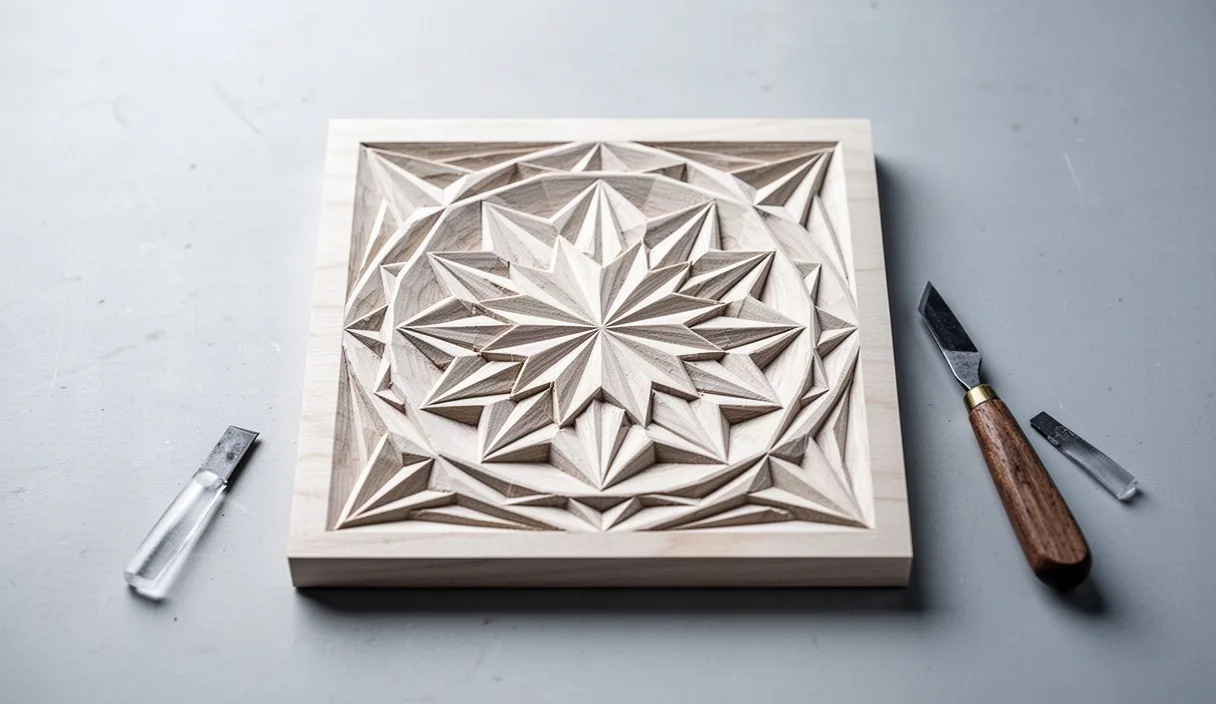
Because the craft relies on dividing space evenly rather than sculpting realistic portraits or flowers, carvers did not need formal art school training. They used practical geometry. A compass walk could divide a circle into six equal parts, and joining those points created six-pointed stars, rosettes, and triangular borders. The patterns were geometric because geometry is inherently repeatable and symmetrical. When carved into pale woods like linden, which North American woodworkers call basswood, or close-grained northern pine, these cuts created high contrast under the warm, angled light of an oil lamp or a fireplace.
Dowry boxes and trinket caskets were especially favored for this style of carving. A small box built with dovetail joints or simple wooden pins offered six flat panels that could hold border patterns, central medallions, and corner motifs. The carving was not merely decorative; the recessed facets provided a tactile texture that made smooth box lids easier to grip with cold hands, while simultaneously turning a plain utility container into a family heirloom passed down through generations.
Essential tools: the chip knife and marking gauge
You do not need a shop full of specialized equipment to begin chip carving, but the few tools you use must be chosen with care. At the heart of the craft is the chip carving knife. Unlike a standard whittling knife, which often has a rounded belly designed for slicing away long curls of wood, a dedicated chip knife features a short blade, usually between 25 and 35 millimeters in length, with a straight cutting edge and an acute, pointed tip.
Why is the blade kept so short? Think about holding a long pencil near the eraser while trying to write tiny, neat letters. Your hand wobbles, and you lose control. If you choke up and hold the pencil right near the lead tip, your handwriting becomes sharp and steady. A short knife blade works the same way. It keeps your control hand close to the timber, giving you fine control over the depth of the cut and the angle of the blade against the wood grain.
| Tool Name | Primary Function | Key Characteristic to Look For |
|---|---|---|
| Standard Cutting Knife | Removing three-corner chips | Straight cutting edge with a 65-degree point angle |
| Modified Skew Knife | Cleaning deep corners and lines | Angled tip designed for clearing hard-to-reach pockets |
| Marking Gauge | Scribing border lines parallel to edges | A micro-adjustable fence with a brass locking screw |
| Dividers or Compass | Stepping off equal triangle spacings | Stiff friction joint or screw-set legs that do not slip |
| Hard Drafting Pencil (2H) | Drawing the cutting grid | Dense graphite that leaves a fine line without smudging |
Alongside your knife, your layout tools dictate the ultimate quality of your cuts. A marking gauge with a hardened steel wheel or a sharp pin allows you to score crisp border reference lines parallel to the box lid edges. A pair of metal dividers is essential for stepping off repeated distances without measuring each fraction of a millimeter with a ruler. When you mark your pattern, use a hard drafting pencil, such as a 2H or 3H. Soft pencils, like standard school pencils, produce thick lines that smudge under your palm and hide the true center points of your triangles.
Drawing accurate triangle grids on timber
A chip knife only cuts where the carver guides it, and your eye can only guide the knife if the layout lines are crisp. If your drawn triangles vary in size by even half a millimeter, the human eye detects the error instantly once the facets begin reflecting light. Layout is the foundation of the cut.
Before putting graphite to wood, prepare your box lid by scraping or planing the surface flat. Sanding can leave abrasive silicon carbide particles embedded in the wood pores, which will dull your knife edge after only a dozen cuts. Once the surface is clean and flat, use your marking gauge to establish a border around the perimeter of the lid. A border set 6 to 10 millimeters from the box edge frames the carving and protects the fragile tips of the triangles from chipping off if the box is bumped during daily use.
- Establish the baseline: Use a straightedge and your hard pencil to draw a faint line parallel to your border. This line serves as the base for your first row of triangles.
- Step off the intervals: Set your dividers to your desired triangle width, for example, 8 millimeters. Place the pivot point at the start of your baseline and swing the other leg to press a tiny prick mark into the timber. Walk the dividers down the entire baseline without lifting both legs at once, creating an evenly spaced series of points.
- Form the equilateral points: Without changing the divider width, place the pivot point on the first baseline prick mark and swing a light arc above the line. Move the pivot to the second prick mark and swing a crossing arc. The intersection of those two arcs marks the apex of your first triangle.
- Connect the vertices: Lay your metal straightedge across the points and connect the base marks to the apex marks using light, single-stroke pencil lines. Do not press hard into the wood fiber; a deep groove made by a pencil can split the wood along the grain before the knife even touches it.
- Note the grain orientation: Draw a faint arrow in an unused corner showing which way the wood grain runs. You will need to check this arrow constantly while carving, because cutting with the grain requires a different knife direction than cutting against it.
The three-cut plunge technique explained
The fundamental building block of geometric chip carving is the three-corner chip, often called a pyramid chip. When cut properly, this shape creates an inverted triangular pyramid within the surface of the wood. The three triangular walls slope down from the surface lines to meet at a single deep point in the center, called the keel or the apex.
How do three straight knife cuts remove a three-dimensional wooden pyramid? The knife enters the wood at an angle, usually around 60 to 65 degrees relative to the flat face of the board. If you hold the knife straight up and down at 90 degrees, you merely stab the wood without freeing any waste. If you hold it too flat, around 30 degrees, the cut becomes shallow, the shadows disappear, and the pattern looks weak. The ideal 65-degree slope creates deep walls that catch bold shadows while leaving enough wood underneath to prevent the bottom from breaking through.
To execute the cut, you never change your hand posture; instead, you turn the wooden box. Your hand and forearm should act as a stable, unified clamp, pivoting from the wrist or elbow while your knife maintains its set angle.
- The center plunge along the grain: Place the point of your knife directly at the deep center mark where the three facets will meet. Tilt the handle away from you so the blade aligns with one corner of the drawn triangle. Press the tip straight down to your target depth, usually about 2 to 3 millimeters deep. As you draw the knife outward toward the corner, lower the handle slightly so the full length of the blade cuts the wood wall at a consistent 65-degree angle, stopping exactly at the surface point.
- Rotate the workpiece: Spin the box roughly 120 degrees on your workbench. Never reach across your body or twist your wrist into an awkward position to make the second cut. Reorienting the box keeps your cutting motion comfortable and identical for every stroke.
- The second incision: Place the knife point back into the deep center mark. Align the blade with the second corner point. Push the blade down into the existing center slit and slice outward toward the second corner, mirroring the depth and slope of the first cut.
- The relief slice and chip release: Rotate the box once more to face the third corner. Plunge the knife point into the center mark for the third time. As you draw the blade toward the final corner, the knife frees the wooden wedge from its remaining attachment points. You will hear a faint wooden click, and the chip will pop cleanly out of the pocket, leaving three polished facets meeting at a sharp center point.
If the chip does not fall out freely, do not pry it out with the tip of your blade. Prying will bend or snap the fragile knife tip, and it will tear the wooden fibers at the bottom of the pocket. If a chip sticks, it means your cuts did not meet cleanly at the center. Simply reinsert the knife into the cuts and repeat the strokes with light pressure to shear the remaining fibers.
Fixing torn corners and uneven depths
Even experienced carvers occasionally meet difficult grain or misjudge the depth of a cut. When carving along the long grain of the wood, the knife glides smoothly. But when the cut runs against the grain, the wood fibers can bend forward instead of parting, resulting in a torn, fuzzy edge. Knowing how to read the grain and repair these small accidents makes the difference between an abandoned project and a finished heirloom.
What should you do when a corner tears out? First, stop cutting immediately. Assess which way the grain is running. Wood grain behaves like the fur on a cat: if you stroke it from head to tail, it lies smooth and flat; if you stroke it backwards, the hairs stand up and resist. If your blade was slicing against the grain, turn your box around and approach the corner from the opposite direction. By making a light, paper-thin shaving down into the facet, you can slice away the torn fibers and restore a polished wooden face.
Uneven depth is another frequent hurdle. If one side of your triangle is cut deeper than the other two, the center keel will look tilted and lopsided. To correct this, take a skew knife or your standard chip knife and make an additional slicing cut on the two shallow walls. Deepen those cuts by a fraction of a millimeter until their floors reach the bottom of the deepest side. Keep in mind that deepening a wall slightly enlarges the footprint of the triangle at the surface, so work incrementally. Never attempt to remove a heavy amount of wood in a single correction cut.
Resist the temptation to reach for sandpaper to smooth rough cuts inside your chip pockets. Sandpaper softens the crisp, knife-cut ridges that give chip carving its beauty. Once those sharp interior ridges are rounded off by abrasive paper, they no longer cast defined shadows, and the pattern will look muddy and indistinct. The only tool that should touch the inside of a carved chip is a razor-sharp steel edge.
Common mistakes to avoid
Most frustrations in chip carving stem from a few predictable habits. Being aware of them early will protect both your timber and your fingers.
- Using a knife that is merely sharp rather than polished: A knife that easily cuts kitchen vegetables is not sharp enough for chip carving. The edge must be polished on a leather strop loaded with fine honing compound until it exhibits a mirror sheen. If the blade leaves tiny white scratch lines on the carved wood facet, the edge has micro-serrations and needs immediate stropping.
- Allowing fingers to rest in front of the blade path: Chip carving relies on hand pressure close to the work surface. Always position your holding hand behind the cutting edge or on the side of the box opposite the cut direction. If the blade slips out of an incision, it must travel into open air, never into flesh.
- Pushing too deep on the first attempt: Deep cuts require substantial hand pressure, which reduces your control. For larger triangles, make a shallow initial cut to define the walls, followed by a second pass to reach full depth.
- Carving under flat, overhead lighting: If your room is illuminated only by diffuse ceiling lights, your carved chips will show no contrast, making it nearly impossible to evaluate depth and symmetry. Position a small desk lamp to the side of your bench so light rakes across the wood surface at a low angle, casting bold shadows into every chip.
Next steps for your box project
Before carving directly into the lid of an assembled or expensive wooden box, take an afternoon to practice on a scrap board of northern basswood or clean white pine. Draw a straight line of ten identical three-corner chips. Carve the first five slowly, paying attention to the angle of your knife blade and noting how the wood reacts as you transition from cutting across the grain to cutting with it.
Once your scrap board chips pop free cleanly with glossy facets, move on to your box. Begin your design with a simple perimeter border of repeating triangles. A narrow border teaches you how to keep your cutting depth consistent across the entire length of a panel. When you are confident, you can incorporate four-corner chips, curved chips, and central rosette stars into the middle of the lid.
When the carving is complete, avoid thick film finishes like heavy polyurethane, which puddle in the deep corners of your cuts and obscure the crisp geometric lines. Instead, apply a thin coat of paste wax or a light application of boiled linseed oil. A simple, thin finish shields the raw timber from dust and moisture while allowing the natural play of wood grain, clean facets, and deep shadows to remain the focal point of your work.