
Working with fresh, green timber is one of the distinct pleasures of traditional woodcarving. When wood comes straight from a freshly felled tree, it cuts under a gouge or an axe like cold butter or cheese rather than brittle stone. The natural sap lubricates the cutting bevel, cuts yield clean ribbons rather than dusty chips, and your muscles do far less work to establish the broad contours of a spoon, bowl, or sculpture. Yet, this high moisture content is a double-edged sword. As soon as a tree is bucked into logs, the clock starts ticking against the natural drying process.
Left to sit unprotected in a driveway or workshop corner, a solid green log will rapidly destroy itself. You might leave a sound log on a Friday evening, only to return on Monday morning to find deep, wide fissures running from the bark directly into the heart of the trunk. Seasoning and storing green timber is not about removing all the water as quickly as possible. For the carver, it is about controlling the rate and path of water loss so the wood remains relaxed, stable, and workable until you are ready to cut your finished piece.
Why green wood checks and splits as it dries
Why does fresh timber tear itself apart when it sits in the open air? To understand this, think of a freshly cut log as a dense bundle of microscopic drinking straws packed with water. Wood contains moisture in two distinct states: free water and bound water. Free water is liquid sap that fills the open cell cavities, much like water sitting inside the bore of a drinking straw. Bound water, on the other hand, is chemically held within the cell walls themselves, soaking the cellulose fibers like water saturated into the cardboard body of the straw.
When a log begins to dry, it sheds its free water first. During this period, the actual physical dimensions of the timber barely change. The trouble begins when the wood reaches what woodworkers call the fiber saturation point, which usually occurs when moisture drops to around 28 percent of the dry wood weight. Once the free water is gone, the wood starts shedding bound water directly from its cell walls. As these fibers release their moisture, they shrink, pulling closer together.
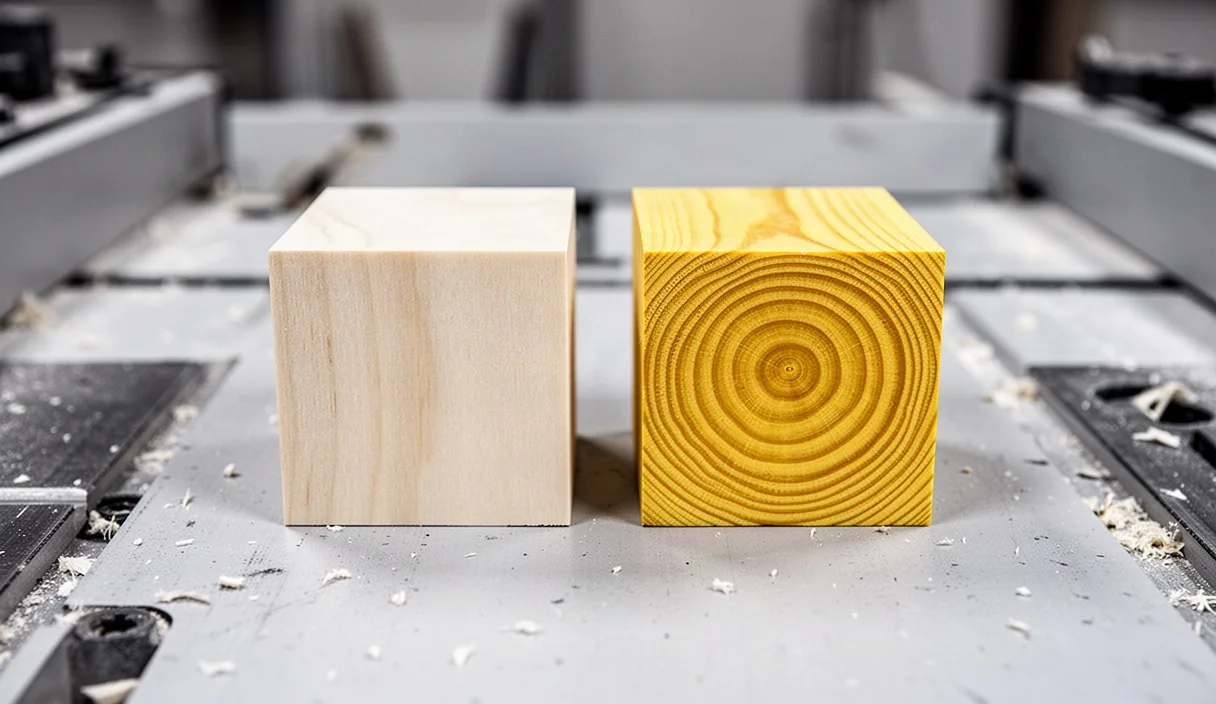
Wood does not shrink uniformly in every direction. This uneven movement is the root cause of every check, crack, and split you encounter. Timber shrinks along three primary axes:
- Longitudinal: Along the length of the trunk, following the direction of the grain. Shrinkage here is negligible, rarely exceeding 0.2 percent from green to bone dry.
- Radial: Across the growth rings, moving along lines from the center pith straight out to the bark. Shrinkage here is moderate, usually between 3 percent and 5 percent.
- Tangential: Along the circumference of the growth rings, curving around the log. Shrinkage in this direction is dramatic, often reaching 7 percent to 10 percent.
Because the timber shrinks roughly twice as much around its circumference as it does from the pith to the bark, the outer perimeter tries to get smaller while the core retains its size. The outer wood develops intense tensile stress as it stretches over the swollen center. Eventually, the tension exceeds the strength of the wood fibers, and the log tears itself open along radial lines. These fissures are known as drying checks.
The science of end-grain moisture loss
Why do these cracks almost always start at the cut ends of the log rather than along the bark? The answer lies in the orientation of those microscopic wood cells. Trees evolved to pull water upward from the root system to the canopy through continuous vertical tubes called tracheids and vessels. Because the cells run lengthwise, water travels along the grain between ten and fifteen times faster than it can escape across the grain through the side walls of the wood.
When a tree is crosscut with a saw, thousands of these cellular tubes are severed and left wide open to the atmosphere. The moisture sitting near the cut ends evaporates into the surrounding air within hours. Meanwhile, moisture located twelve inches deeper into the log remains trapped, moving outward at an agonizingly slow crawl through the cell walls.
This creates a severe moisture differential within the same piece of timber. The first two inches of the log reach the fiber saturation point and begin shrinking, while the wood further inside remains completely swollen with free water. The dried ends attempt to contract, but the wet core holds them in place. The resulting battle between shrinking ends and swollen cores rips the end grain apart, creating radial star checks that can ruin eight to twelve inches of usable carving timber on either side of the cut.
Applying wax or anchorseal to cut rounds
How do we stop this rapid evaporation from the ends of the wood? We must replace the tree's natural defense mechanism, which was removed the moment the chainsaw cut through the trunk. The most effective way to protect a round log is to seal the exposed end grain with an impermeable coating, forcing the moisture to exit slowly and evenly through the bark over many months.
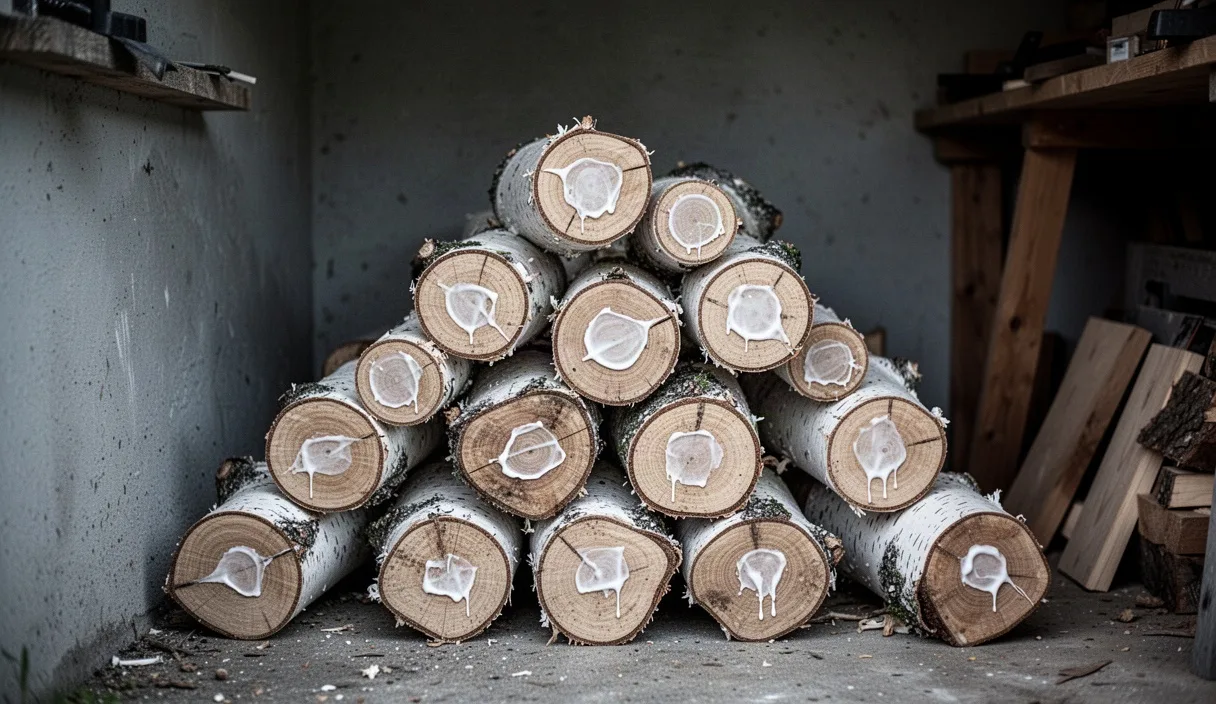
The standard treatment for green timber is an end-grain sealant. Two main options exist for the carver: commercial paraffin-wax emulsions, commonly sold under brand names like Anchorseal, or melted household wax. Sealants work by plugging the open ends of the cellular tubes, slowing the rate of end-grain evaporation so that it matches the slow rate of lateral moisture loss through the bark.
| Sealant Type | Application Method | Curing Time | Durability | Best Use Case |
|---|---|---|---|---|
| Anchorseal (Wax Emulsion) | Brush on straight from jug | 12 to 24 hours to turn clear | High; remains slightly flexible | Whole logs, large limbs, long-term storage |
| Melted Paraffin / Beeswax | Dip end or paint with natural bristle | Instant upon cooling | Moderate; can flake if struck | Small blanks, spoon billets, quick fixes |
| Latex House Paint (2 to 3 coats) | Brush on heavy | 4 to 8 hours between coats | Low to moderate; partially breathable | Emergency stopgap when wax is unavailable |
For the best results, seal the timber immediately. Do not wait until the next weekend. If a log sits in the sun for even four hours on a dry afternoon, the ends will have already begun the drying process that leads to microscopic checks.
Prepping the timber surface
Ensure the cut face is reasonably clean. If the crosscut was jagged or torn by a dull chain, smooth off high spots with a sharp hand saw or axe, which removes loose fibers that prevent wax from making direct contact with the solid wood cells. Clear away loose sawdust with a stiff brush.
Brushing the sealant
Dip a cheap, disposable paintbrush into the wax emulsion and spread a thick, milky coat over the entire end grain. Do not spread it thin like wall paint. You want a milky layer roughly the thickness of heavy cream. Coat every millimeter of the wood, from the center pith right up to the cambium layer.
Wrapping the rim
Extend the coating past the cut face and down onto the sides of the log. Brush the sealant two to three inches up the bark. If the bark has peeled away in spots, paint three to four inches up the exposed sapwood. This prevents rapid drying through the vulnerable spots where the natural protection of the bark has been breached.
Storing rounds in shaded outdoor air
Once your cut rounds are sealed, where should they live? It is tempting to drag valuable timber into a heated shop or basement to keep it safe from the elements. This is almost always a mistake. Interior spaces, especially those with winter heating or summer air conditioning, have very low relative humidity. Placing a green, wet log into a dry indoor room pulls moisture out too fast, overwhelming even the best coat of wax.
Green timber seasons best when stored outside in an environment that mimics the ambient conditions of the forest floor. You want high humidity, constant shade, low wind, and protection from pooling ground water. A shaded spot under the eaves on the north side of an outbuilding, or beneath a dense canopy of trees, offers the ideal microclimate.
Air movement is critical, but excessive wind must be avoided. A gentle, natural draft carries away evaporating moisture before mold can take over the sapwood, but a stiff, constant breeze will dry the exterior of the log too quickly, causing surface checking along the bark. Never lay your timber directly onto dirt, grass, or concrete. Soil contains moisture, fungi, and insects that will rot the bottom of the log within weeks, while concrete draws moisture out unevenly through capillary action.
Set up your storage stack using sacrificial runners, known as stickers, to lift the logs off the dirt by at least four to six inches. You can use cheap landscape timbers, cinder blocks, or split scrap wood. Stack your sealed rounds on these supports, leaving two to three inches of space between adjacent logs so air can circulate freely around the bark. If you must cover the timber to protect it from direct sun or heavy rain, drape a canvas or plastic tarp over the top, but prop it up like a tent. Never wrap a green log tightly in plastic outside; the trapped humidity will create a greenhouse environment that spurs fungal growth, turning beautiful carving wood into punky, rotten pulp.
The freezer method for saving prepped blanks
What should you do when you split a sound log into blanks, carve half of a spoon or bowl, and run out of time? Once a log is split into small pieces, its surface-area-to-volume ratio increases dramatically. The bark is gone, the sides are exposed, and an axe-hewn blank will dry and check within twenty-four to forty-eight hours on an open workbench. If your carving time is interrupted by work or family, cold storage provides an effective solution.
Freezing does not dry green wood; it stops time. By lowering the temperature of the timber below freezing, you halt the biological processes of mold and rot, and you dramatically slow the rate of evaporation. Water cannot easily leave the cellular structure as vapor when it is locked into ice. In fact, many green woodworkers keep an ordinary chest freezer in their shop specifically to hold prepped spoon blanks, roughed-out bowl preforms, and delicate tool handles until they have free hours to carve.
To freeze your carving blanks without damaging the wood fibers, follow this simple process:
Removing excess surface water
If you carved the piece while wetting it, or if it was exposed to rain, blot the exterior with a clean cloth. You want the cellular tubes full of water, but you do not want pooled water on the surface, which forms thick sheets of ice that can tear wood fibers during freezing.
Bagging the blanks
Place the prepped blank inside a heavy-duty plastic freezer bag. Squeeze out as much air as possible before sealing the zipper. If the blank is too large for standard bags, wrap it tightly in three layers of commercial plastic stretch wrap, folding the ends over to prevent air exchange. The goal is to eliminate ambient air spaces where ice can sublimate directly out of the wood, causing a dry, chalky condition known as freezer burn.
Managing the thaw
When you are ready to carve again, pull the bag from the freezer and let it sit on your bench, unopened, for two to three hours. Allow the timber to return to room temperature while still sealed inside the plastic. If you open the bag immediately, warm room air will hit the freezing wood, causing heavy condensation to form on the surface. Once the wood has fully thawed, take it out and begin cutting immediately. The timber will be just as soft, wet, and responsive to your gouges as it was the moment you split it from the log.
Common mistakes
Even seasoned craftspeople can ruin valuable timber by overlooking small environmental factors. Watching for these common missteps will save your blades and your patience.
- Leaving the pith inside split billets: The pith is the juvenile wood at the dead center of the tree. It is chemically unstable and shrinks at different rates than the surrounding heartwood. Always split logs directly through the pith and carve it away completely. Leaving the pith inside a blank guarantees a crack along the center line.
- Stacking wood directly against an exterior wall: Piling logs flat against the side of a shed stops air from circulating on the back side. The front dries while the back stays wet and gathers mold, inducing uneven stress throughout the log.
- Using brittle varnishes instead of wax: Household polyurethane, shellac, and fast-drying lacquers cure into hard, glass-like films. As the wood makes its subtle, natural adjustments, these brittle films crack immediately, leaving passages for moisture to escape. Use soft paraffin or microcrystalline wax emulsions that flex without breaking.
- Rushing the thaw with heat sources: Setting a frozen blank next to a wood stove or over a heating register causes the surface to dry in minutes while the center is still an icy block. This extreme temperature difference causes immediate, deep checking.
Practical next steps for your green timber
If you have green logs sitting in your yard right now, take an inventory of their current condition before picking up an axe. Inspect the cut ends for dirt, decay, or tiny hairline checks. If checking has already begun, use a crosscut saw to cut two to three inches off the end of each log to expose sound, solid wood that has not yet started to pull apart.
Next, gather your sealing supplies. Keep a gallon of wax emulsion and an inexpensive brush near your log-processing area. As soon as you bring down a limb or buck a log to length, apply the sealant to the fresh ends within sixty minutes. Set up two treated four-by-four posts or sound scrap logs in a cool, shaded corner of your yard to serve as elevated bunks for the wood pile.
Finally, consider how you plan to carve the material. If you have small logs, split them radially into halves or quarters rather than leaving them in the round; splitting relieves the tangential tension around the growth rings and prevents the log from exploding later. For pieces you intend to shape over several weekends, prepare a designated shelf in your chest freezer and stock up on heavy plastic bags. Managing moisture requires a small amount of discipline up front, but it rewards you with sweet-cutting, defect-free timber whenever you sit down to carve.