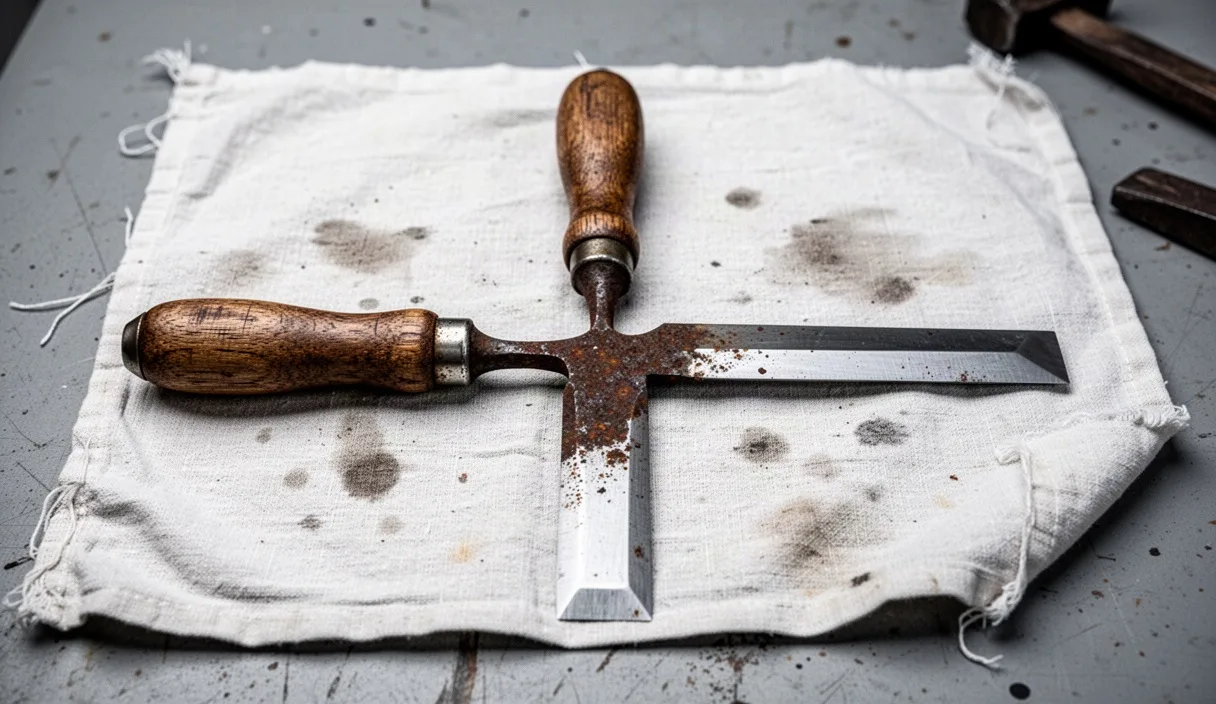

Old hand chisels discovered in estate toolboxes, barn corners, or damp basement drawers often look ruined at first glance. Steel reacts readily with moisture and ambient air, developing an orange, red, or dark brown skin that looks like decay. Because an edge tool relies on crisp geometry and flat surfaces to sever wood fibers cleanly, many woodworkers feel tempted to drop rusted chisels into a bath of harsh chemical stripper or household acid to burn away the corrosion overnight. While that method strips rust rapidly, it often trades surface dirt for irreversible steel damage.
Restoring vintage chisels requires a gentler philosophy. Old carbon steel, especially the cast or laminated steel found in tools made before the mid-twentieth century, possesses exceptional edge-holding qualities that modern budget tools rarely match. By removing iron oxide mechanically with lubricants and softer metals, you protect the heat treatment, maintain the flatness of the critical chisel back, and preserve the original maker marks. Taking the patient path lets you rescue the tool without stripping away its working life.
Assessing surface rust versus deep steel pitting
How can you tell if an old chisel is worth cleaning? You begin by distinguishing between surface rust and deep pitting. Rust is simply iron oxide, formed when iron atoms bond with oxygen in the presence of water. On the surface, this begins as a loose, powdery coat that wipes off on your fingers, often leaving a dull gray or dark patina underneath. Patina is stable iron oxide, often magnetite, which actually shields the underlying steel from faster decay. Pitting, however, occurs when galvanic reactions or trapped pockets of water bore deep cavities directly into the metal body.
Think of steel like a loaf of dense rye bread. Surface rust is like dusting loose flour over the crust: you can brush it off without changing the shape of the loaf. Pitting is like an air bubble or a gouge inside the bread itself. If an air pocket forms on the outer crust, it does not harm the center. But if that bubble cuts through the knife edge of a slice, the edge crumbles when pressed. In the same way, deep pits on the primary bevel or the flat back of a chisel destroy its ability to hold a razor-sharp apex.
| Feature | Surface Rust (Oxidation) | Deep Steel Pitting |
|---|---|---|
| Texture | Powdery, rough, or greasy to the touch | Cratered, jagged, and recessed below the surface |
| Effect on chisel back | Leaves minor discoloration after cleanup | Creates holes that interrupt the cutting line |
| Remediation required | Light oil and non-ferrous abrasive wool | Extensive grinding or flattening on coarse stones |
| Impact on utility | Minimal: original tolerances stay intact | Severe: blade may need shortening by 10 to 20 millimeters |
Inspect the tool starting at the cutting edge and move back roughly 50 millimeters. This first section of the chisel back is the reference face, which must become completely flat during sharpening to guide the tool through wood. If deep craters pockmark this specific zone, you will have to lap away metal until you reach the floor of those craters, which can consume hours of manual labor. If the pitting sits solely on the socket, the neck, or the top bevel face, the tool remains completely functional, and you can proceed with basic cleaning.
Mechanical cleaning with bronze wool and oil
The safest way to strip loose rust without scratching sound metal is to use an abrasive that is harder than rust but softer than tool steel. Hardened high-carbon steel typically rates between 58 and 62 on the Rockwell C scale. Red iron oxide has a hardness comparable to soft glass, yet it sits loosely bound to the metal. Bronze wool, made from an alloy of copper and tin, possesses enough stiffness to break the bond of the rust flakes while sliding harmlessly across the harder tool steel underneath. Unlike steel wool, bronze fibers will not embed tiny fragments into the chisel that could later rust again.
Never scrub dry metal with dry wool. Dry scrubbing creates airborne particulate that you should avoid inhaling, and it allows dislodged oxide crystals to grind against the tool like sandpaper. A light carrier liquid keeps the work clean and suspends the rust particles as you work.
- Select a lubricant: Apply a generous coating of light mineral oil, non-detergent machine oil, or technical grade white oil across the steel surfaces. The oil softens dried grime and lifts rust particles away from the metal matrix.
- Begin with coarse bronze wool: Press medium-coarse bronze wool firmly against the metal, rubbing in straight strokes parallel to the length of the tool. Scrubbing across the tool width creates visual swirl marks that distract the eye and take longer to blend later.
- Wipe away the slurry frequently: As you scrub, the clear oil turns into a thick, brown paste. Wipe this residue away every two minutes using a clean cotton rag or paper shop towel. If you leave the slurry on the steel, you end up rubbing rust back into rust.
- Transition to fine bronze wool: Once the orange powder vanishes and the rag comes away light gray rather than dark reddish-brown, switch to fine-grade bronze wool lubricated with a fresh layer of oil to polish out minor scuffs and even the sheen.
- Clear stubborn spots with brass: If small, crusty scabs of corrosion resist the wool, scrape them with a brass scraper or the flattened edge of a spent brass cartridge casing. Brass is soft enough that it will bend or yield before scratching hardened steel.
This mechanical method leaves behind a smooth, slate-gray finish known as aged patina. Do not attempt to scrub this gray film down to bright, silvery steel. The dark gray layer is passive and stable, meaning it does not actively eat away metal, and it provides an organic barrier against new humidity.
Why harsh chemical soaks can harm tool edges
It is tempting to submerge a batch of crusty tools into a container of white vinegar, muriatic acid, or phosphoric acid and walk away. Acid attacks iron oxide aggressively, dissolving rust in a matter of hours. However, acid does not stop working once the rust is gone; it continues to attack the unoxidized steel beneath. This chemical erosion poses distinct hazards for hand tools that depend on tight tolerances.
First, acids cause hydrogen embrittlement in hardened carbon steel. During the chemical reaction between acid and iron, atomic hydrogen releases at the surface. Some of these minuscule hydrogen atoms diffuse into the crystalline lattice of the steel. When you later take the chisel to a hardwood board and strike the handle with a wooden mallet, the steel cannot absorb the shock elasticity, leading to microscopic chipping along the cutting edge or sudden structural cracking through the blade body.
Second, acid attacks steel unevenly. Pure iron dissolves faster than the iron carbide structures that give tool steel its wear resistance. This differential etching turns polished, mirror-like chisel backs into a microscopically pitted landscape resembling an orange peel. Sharpening requires bringing two flat planes together to form a zero-radius line at the tip. If acid etches microscopic pits along the back of your tool, your honed edge will resemble a tiny saw blade instead of a razor, causing tearout on end-grain cuts.
Finally, acid stripping removes every trace of historic patina, leaving the raw metal reactive. Steel pulled from an acid bath flash-rusts within minutes of exposure to air unless neutralized with an alkaline wash, dried instantly, and oiled. If you neutralize with baking soda water, you introduce more moisture to a surface that is now chemically eager to oxidize. Gentle mechanical scrubbing avoids this cycle altogether.
Cleaning and treating the wooden socket handle
Many vintage chisels feature a socket design, where a tapered wooden handle seats directly into a hollow steel cone at the rear of the blade. Tang chisels, by comparison, have a metal spike that drives upward into a pre-drilled wood handle bound by a brass ferrule. Both styles often arrive encrusted with dried varnish, paint spatters, grease, and sweat from past generations of woodworkers. Treating the steel while ignoring the handle leaves the tool vulnerable to rot and loose fits.
Check the bond between the handle and the blade before applying liquids. If you have a socket chisel, you can often release the handle with a gentle mechanical shock. Wrap the steel blade in a leather scrap, hold the chisel horizontally over a padded bench, and tap the steel socket ring sharply with a wooden mallet while pulling the handle outward. If the wood remains stubborn, leave it alone: forcing the joint risks splitting decades-old hickory, ash, or boxwood.
If the handle stays attached, avoid soaking the tool assembly in any solvent or water. Wood fibers act like tiny sponges. If liquid runs down inside the socket or under the ferrule, it becomes trapped. The wood swells temporarily, stretching the socket, and then shrinks back smaller than before as it dries, leaving the handle permanently loose. Trapped water inside an enclosed steel socket also breeds hidden rust that can rot the metal from the inside out.
To refresh the handle safely, clean the wood surface with a rag lightly dampened with mineral spirits. Mineral spirits dissolves old grease, wax, and surface grime without raising the wood grain or dissolving the natural resin glues within the wood. Once dry, smooth down any raised fibers with a handful of fine bronze wool or high-grit finishing paper (around 400 grit), working strictly along the direction of the grain. Rub two thin coats of pure boiled linseed oil or pure tung oil directly into the dry wood, allowing 24 hours between coats for the curing oil to polymerize within the outer cell cavities. This treatment feeds the wood, seals out future sweat, and preserves the tactile grip a woodworker needs.
Long-term rust prevention with natural oils
Once you clean away the rust and secure the handle, how do you keep moisture from reclaiming the steel? Steel rusts because moisture and oxygen exist in the ambient air of every workshop. To prevent rust, you must place an unbroken barrier between the metal atoms and the surrounding atmosphere. While synthetic sprays and aerosol protectants exist, natural oils and wax formulations have preserved steel edges for centuries with great success.
Camellia oil, pressed from the seeds of Camellia oleifera, is a traditional Japanese protectant for fine joinery tools. It is a non-drying, acid-free vegetable oil with low viscosity. A few drops spread over a chisel blade create an ultra-thin film that displaces water droplets and repels airborne dust. Because camellia oil does not dry into a hard lacquer, it wipes away effortlessly when you bring the tool to your sharpening stones, preventing the contamination of fine waterstones.
Jojoba oil offers another plant-derived alternative. Chemically, jojoba is not an oil but a liquid wax ester. This molecular structure gives it incredible stability: unlike vegetable cooking oils such as olive or canola, jojoba oil does not go rancid, turn sticky, or form gummy deposits when exposed to heat and oxygen over long periods. It creates a slick, friction-reducing skin that protects against finger acid, which contains salt and moisture that instantly etches clean steel.
For long-term storage in damp climates, paste wax made from carnauba and beeswax provides the highest level of moisture resistance. Paste wax forms a hard, dry barrier that stays put even if the tool rubs against a wooden tool roll or rack. Apply a small dab with a cotton cloth, let it haze over for ten minutes, and buff it out briskly with a clean rag. The resulting microscopically thin wax crust prevents humid air from ever touching the polished steel.
Common mistakes
- Spinning a high-speed wire wheel on a bench grinder: The fast-spinning wire bristles quickly strip rust, but they round off the crisp reference edges of the chisel back, soften the sharp corners, and can fling brass or steel wires at high velocity. The friction can also generate enough localized heat to draw the temper out of thin steel cutting tips.
- Using coarse silicon carbide sandpaper: Sandpaper tears deep, jagged scratches into soft carbon steel. Flattening those deep scratches out later requires removing significant amounts of good tool steel on sharpening stones, shortening the lifespan of the tool.
- Storing tools in damp leather wraps: Vegetable-tanned and chrome-tanned leathers retain atmospheric moisture and can contain residual processing salts and acids. Chisels left inside leather rolls for months at a time often emerge coated in heavy rust pitting.
- Using household food oils for storage: Olive oil, vegetable oil, and lard contain polyunsaturated fatty acids that degrade, turn rancid, and collect moisture, attracting pests and creating a sticky, acidic mess on the tool steel.
- Forgetting to clean off hand oils after work: Human perspiration contains sodium chloride and lactic acid. Storing a chisel immediately after handling it without wiping it down with an oily rag leaves fingerprint-shaped rust patches etched permanently into the metal.
Practical next steps for your restored chisels
With the surface rust safely removed, your chisel is clean and stabilized, but it is not yet ready to cut wood. Cleaning is a preservation step, sharpening is a mechanical shaping step. Take the chisel to your sharpening bench to evaluate the cutting geometry. Rest the back of the blade flat on your flattest, medium-grit sharpening stone (around 1000 grit) lubricated with water or honing oil. Work the back back and forth with even downward pressure across the first 25 millimeters of the edge.
Inspect the scratch pattern. If the stone abrades the steel evenly right up to the cutting apex, the tool back is flat, and you can proceed through your finer polishing grits (typically 4000 through 8000 grit). If you discover shallow low spots near the edge, continue working the medium stone until the scratch pattern reaches across the entire cutting width. Establish a consistent primary bevel angle, typically 25 or 30 degrees depending on whether you use the chisel for paring softwoods or chopping hardwoods with a mallet.
Once honed to a mirror finish, wipe the steel completely dry of water or honing slurry, apply two drops of camellia or jojoba oil, and store the tool in a dry wooden rack or a breathable canvas roll. If you discover structural cracks, deep fissures running through the metal, or severely damaged handles that cannot seat safely, consider consulting an experienced tool conservator or blacksmith before putting the tool under heavy impact.