
When you hold a whittling knife for the first time, your instinct is often to hold it like a kitchen paring knife or a box cutter. You might grab the handle tight, point the blade away from your body, and push hard with your shoulder. Within five minutes, your forearm aches, the cuts look choppy, and the blade slips off the edge of the wood. Wood offers uneven resistance. Unlike an apple or a cardboard box, timber has grain, knots, and density changes that can suddenly divert a knife edge if your grip is loose or poorly anchored.
Safe woodcarving does not rely on arm strength. It relies on leverage, anchor points, and short, controlled blade travel. When you learn how to lock your wrists, use your thumbs as fulcrums, and draw power from your back and chest instead of your fingers, woodcarving stops feeling unpredictable. You gain the ability to take shavings as thin as paper or slice off thick chips without sending the knife flying toward your lap or your fingers.
Why hand grip matters for tool control
Why do woodcarvers talk so much about grip instead of blade sharpness? The answer comes down to kinetic energy and stopping distance. When you push a knife through wood by swinging your elbow or shoulder, your blade travels through the air with considerable speed. If the wood grain splits ahead of the cut, the resistance drops instantly to zero. Without an anchor point, your arm keeps moving along its path until it hits something else, which is often your thigh, your knee, or the hand holding the blank.
Think of it like driving a car in heavy traffic. If you stand on the gas pedal and rely only on your reflexes to hit the brakes before hitting the car ahead, an accident is inevitable sooner or later. A proper carving grip acts like driving with your foot hovering right over the brake pedal. By connecting both hands together or bracing against the wood itself, you limit the blade travel to a fraction of an inch. Even if the wood gives way completely, the blade cannot travel beyond its planned stopping point.
A good grip also directs the bevel of the knife at the correct angle against the wood fibers. Whittling knives typically feature a flat grind or a shallow V-shaped bevel ground to roughly 20 to 25 degrees. If you hold the knife too flat, it simply skims over the surface without biting. If you tilt it too steep, it digs deep into the block like an axe, stops dead, and tears the grain. Stable grips allow you to find that shaving angle and lock it in place across long passes.
| Grip Style | Primary Power Source | Blade Travel Distance | Best Application |
|---|---|---|---|
| Thumb push cut | Guiding hand thumb | 0.25 to 0.75 inches | Convex curves, stop cuts, detail smoothing |
| Chest lever grip | Upper back and shoulders | 1 to 2 inches | Roughing out, stubborn knots, end grain removal |
| Paring cut | Closing knife-hand fingers | 0.125 to 0.5 inches | Fine facets, eyes, hollowed curves |
| Push cut with locked wrist | Torso forward pivot | 0.5 to 1.5 inches | Flattening flats, chamfering square stock |
The thumb push cut for short shavings
The thumb push cut is the workhorse of small whittling projects. If you are carving a simple figure like a 5-inch basswood wizard or an owl, you will use this cut for nearly half your carving time. In this position, the hand holding the knife does not push the blade forward. Instead, the thumb of your opposite hand provides all the forward energy while the knife hand simply guides the angle.
To set up this grip, take the wood blank in your non-dominant hand. Hold it firmly, keeping your four fingers wrapped around the back of the piece and out of the cutting path. Take the knife in your dominant hand with a hammer-style grip, the sharp edge facing away from you. Bring the back of the knife blade toward the wood. Now, place the pad of your non-dominant thumb directly onto the spine of the knife blade, near the handle.
To execute the cut, follow these physical cues:
- Lock the knife wrist: Keep the wrist of your cutting hand completely rigid so the angle of the blade cannot twist mid-cut.
- Extend the guiding thumb: Push the blade forward by straightening the joint of your non-dominant thumb. The movement is tiny, moving the blade forward between a quarter-inch and a half-inch.
- Pivot rather than scrape: Slice the blade slightly sideways as the thumb pushes it forward. A slicing motion cuts wood fibers cleanly, whereas pushing the edge straight ahead acts like a wedge and crushes them.
Because the thumb pushing the blade is anchored to the hand holding the wood, the knife blade can never jump forward into empty space. If the chip breaks off early, the knife stops instantly because your thumb has reached the end of its natural extension. This makes the thumb push cut exceptionally safe for shaping curves, peeling fine curls off a corner, and cleaning out deep corners.
The chest lever grip for tough cuts
Beginners often run into a problem when carving green wood or hardwoods like cherry and walnut: their hand strength runs out. When you need to slice through end grain or remove a bulky corner of wood, pushing with your thumb or wrist will either strain your tendons or lead to uncontrolled slips. The chest lever grip solves this by recruiting the large muscles of your upper back and chest.
This grip looks counterintuitive to people who have never carved before because the knife blade points toward your body. However, when executed correctly, it is one of the most stable grips in traditional green woodworking. You hold the wood in your non-dominant hand and the knife in your dominant hand, with the blade pointing inward toward your chest. Both wrists are brought up tight against your ribcage or sternum.
The secret to this grip is that your arms and hands do not move independently. You press the backs of your thumbs together, forming a solid bridge between your hands. The edge of the blade rests against the wood facing away from the non-dominant hand, but angled across your torso. Rather than pulling your hands inward toward your chest with your biceps, you squeeze your shoulder blades together in back. This expands your chest and pulls your elbows outward.
As your elbows move back, your hands separate along a controlled, fixed arc. The knife slices through the wood cleanly, moving across your chest rather than toward it. Because your hands are physically locked together at the base of your thumbs, the knife can travel no more than an inch or two before your joint mechanics stop the motion. It creates immense cutting force with zero lunging motion, making it ideal for removing thick waste wood quickly.
The paring cut for clean details
What is a paring cut in woodcarving? It operates on the same basic principle as peeling an apple toward your thumb, but with one critical adjustment to protect your skin. In the kitchen, people often let the knife slice straight toward the fleshy pad of their thumb. In whittling, you use the thumb as an anchor post while the knife blade passes safely beside it or pivots past it into a protective guard.
To perform a controlled paring cut, hold the carving in your dominant hand along with the handle of the knife, or grip the wood firmly in your non-dominant hand while resting the thumb of your knife hand against the end of the block. Your knife-hand thumb becomes a stationary pivot point. Place the blade on the wood an inch or two away from that thumb, with the sharp edge facing inward toward your hand.
Instead of pulling with your whole forearm, close your fingers toward your palm. This squeezing motion draws the blade smoothly through the wood. Keep the knife-hand thumb positioned lower than the plane of the cut, or off to the side, so that if the blade finishes its stroke, it slides into open air alongside your thumb, never into the meat of your thumb pad.
This grip gives you micro-control over facial features, hair textures, and delicate concave hollows. Because the cut relies entirely on finger flexion against a fixed thumb, you can stop the cut within a thirty-second of an inch. If you are carving eyes, small notches, or the undercuts on clothing folds, the paring cut delivers the smoothest surface finish because it shears the wood cells instead of fracturing them.
Safety gear every beginner needs on day one
A dull tool and bare hands are a dangerous combination for a novice woodcarver. When you are learning how wood grain reacts to pressure, mistakes will happen. A slip should result in a minor surprise and an intact glove, not an interrupted carving session and a visit to an urgent care clinic. Before you make your first cut on a piece of wood, have three essential protective items ready on your bench.
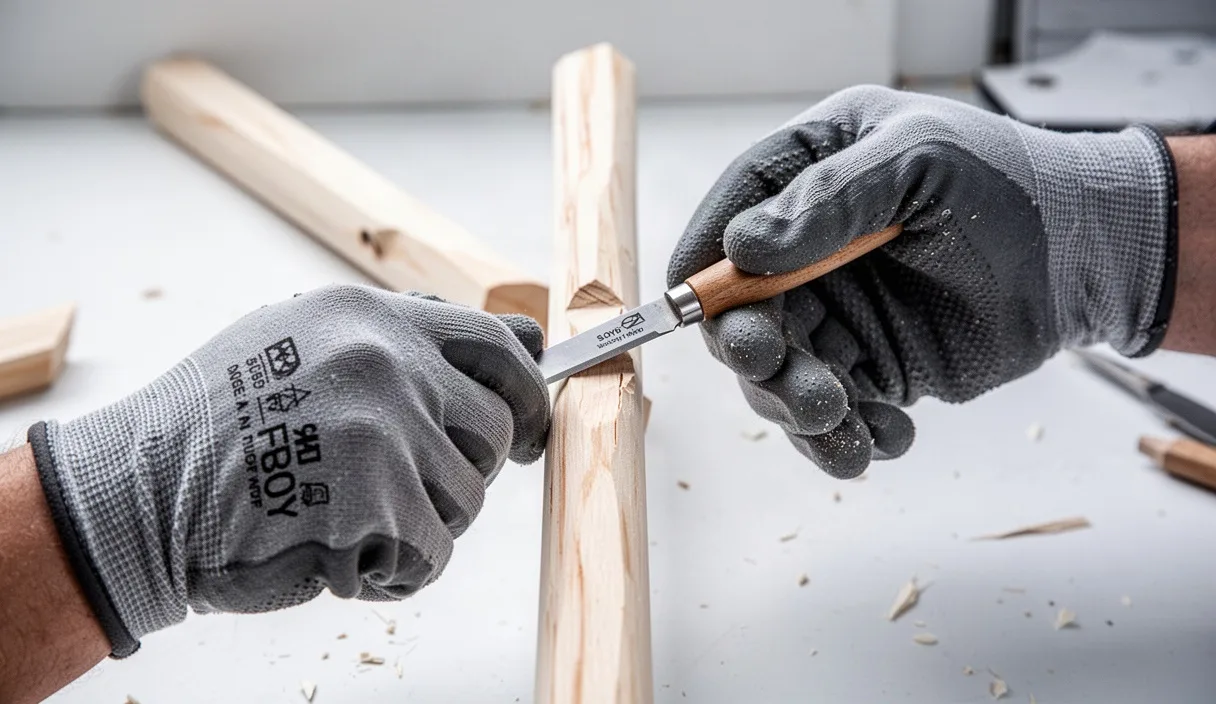
- Cut-resistant carving glove: Buy a glove rated at least ANSI Level A4 or A5 for cut resistance, knitted with high-performance polyethylene (HPPE) or steel-core threads. Wear this glove on the hand holding the wood blank, as that hand sits in the line of potential fire. Never use standard leather work gloves; their loose fit reduces your tactile grip on small pieces of wood, and standard leather offers minimal defense against a razor-sharp carving tip.
- Thumb guard or carving wrap: Even when wearing a glove, repetitive thumb push cuts will wear down your skin and cause bruising. A thick leather thumb guard or self-adhering protective grip tape wrapped two or three times around your dominant and non-dominant thumbs prevents both pressure blisters and accidental nicks.
- Leather strop and compound: Strops are safety equipment. A sharp knife cuts wood cleanly with modest pressure. A dull knife requires you to lean your body weight into the cut, which dramatically increases the chance of slipping. Stropping your blade every 20 minutes on leather loaded with aluminum oxide or chromium oxide compound keeps the cutting edge keen without removing excess metal.
If you do suffer a deep laceration, do not attempt to evaluate tendon or nerve integrity on your own. Wash the wound, apply firm direct pressure with a clean cloth, elevate the hand above the level of your heart, and seek medical attention from a qualified healthcare professional promptly.
Common mistakes that compromise your control
Most beginners make identical handling errors during their initial carving projects. Identifying these habits early keeps your hands safe and your finished carvings crisp.
One frequent mistake is carving into thin air without anchoring your hands together. Whenever possible, your carving hand and your holding hand should touch each other. Whether it is thumb-to-thumb, wrist-to-wrist, or thumb-to-blade-spine, this physical contact creates a closed mechanical loop. When your hands operate as separate islands, your precision drops significantly.
Another error is taking off too much wood in a single stroke. If you find yourself straining until your knuckles turn white, you are trying to remove a board foot when you should be removing a sliver. Woodcarving is a subtractive craft built on hundreds of tiny cuts. Reduce the thickness of your shavings by half, slice at a 45-degree angle across the grain instead of head-on, and let the sharpness of the steel do the labor.
Practical next steps for your first project
To turn these grips into muscle memory, set aside your intended carving project for thirty minutes and pick up a scrap piece of wood. A 1-inch by 1-inch square stick of clean kiln-dried basswood, roughly 6 inches long, is the ideal training ground. Basswood has a fine, uniform grain that cuts predictably in all directions, making it easier to study how the blade behaves.
Put your cut-resistant glove on your holding hand and wrap your knife thumb with protective tape. Sit upright in a stable chair with your feet flat on the floor, clearing your lap of clutter. Spend ten minutes practicing the thumb push cut, focusing solely on producing uniform, curled shavings that are thin enough to see light through. Pay attention to how resting your thumb on the spine gives you complete control over where the blade stops.
Next, switch to the chest lever grip on the end grain of the stick. Feel how your back muscles take over the work, removing thicker bevels from the corners without any wrist strain. Finally, practice the paring cut by tapering the tip of the stick into a four-sided pyramid. Once your hands naturally find these mechanical anchors without conscious thought, you are ready to pick up your first project blank and begin carving with real confidence.